Controller
@Controller
public class HelloController {
 @GetMapping("hello-mvc")
 public String helloMvc(@RequestParam("name") String name, Model model) {
 model.addAttribute("name", name);
 return "hello-template";
 }
}
View
<html xmlns:th="http://www.thymeleaf.org">
<body>
<p th:text="'hello ' + ${name}">hello! empty</p>
</body>
</html>
컨트롤러와 뷰를 나눠서 작업해줘야합니다.
HelloController클래스에
package hello.hellospring.controller;

import org.springframework.stereotype.Controller;
import org.springframework.ui.Model;
import org.springframework.web.bind.annotation.GetMapping;
import org.springframework.web.bind.annotation.RequestParam;

@Controller
public class HelloController {

    @GetMapping("hello")
    public String hello(Model model){
        model.addAttribute("data", "hello!!");
        return "hello";
    }
    @GetMapping("hello-mvc")
    public String helloMvc(@RequestParam("name") String name, Model model) {
        model.addAttribute("name", name);
        return "hello-template";
    }
}
다음 코드를 넣어주고
resources -> template에서 hello-template.html파일을 만들어 아래의 코드를 넣어줍니다.
<html xmlns:th="http://www.thymeleaf.org">
<body>
<p th:text="'hello ' + ${name}">hello! empty</p>
</body>
</html>
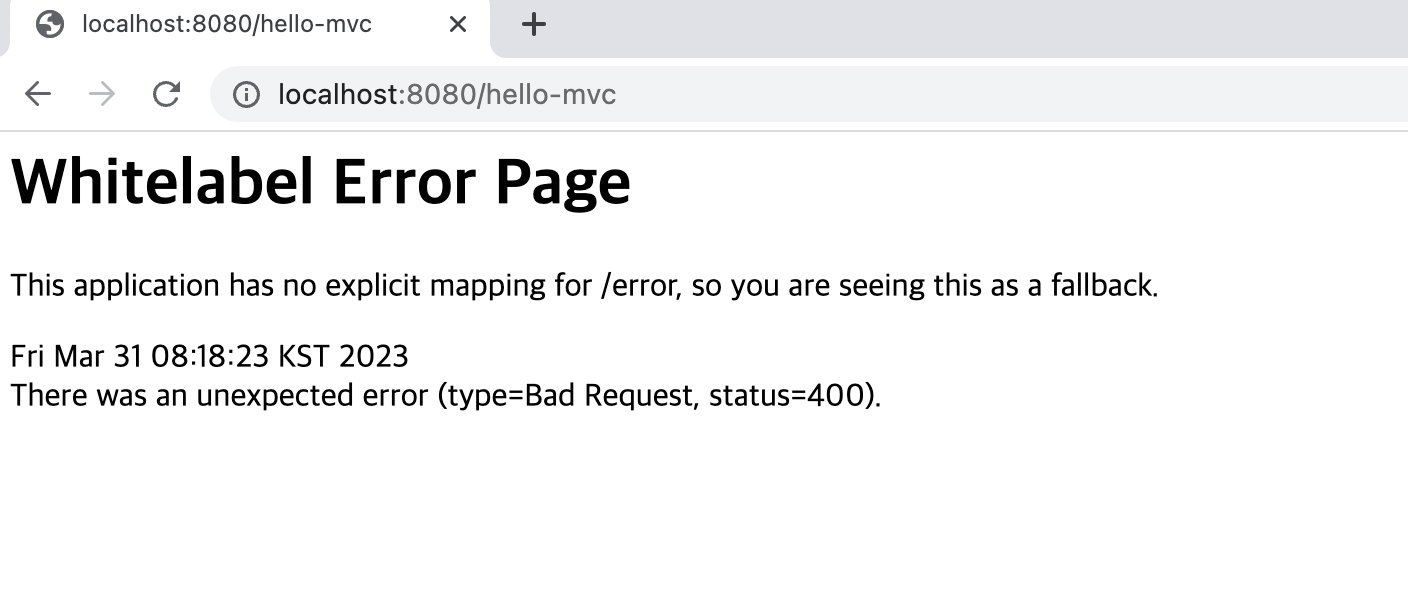
실행해주고 localhost:8080/hello-mvc에 들어가보면 다음과 같이 에러 페이지가 뜹니다.


콘솔에서도 에러가 난것이 확인하실 수 있습니다.
Required request parameter 'name' for method parameter type String is not present
http://localhost:8080/hello-mvc?name=spring!
다음과 같이 주소 뒤에 ?name=spring!을 붙여주면

잘 뜹니다.
※동작방식

주소 뒤의 name=spring!으로 인해
public String helloMvc(@RequestParam("name") String name, Model model) {
    model.addAttribute("name", name);
이 코드의 name이 spring!으로 바뀌고 그 값이 model에 담깁니다.
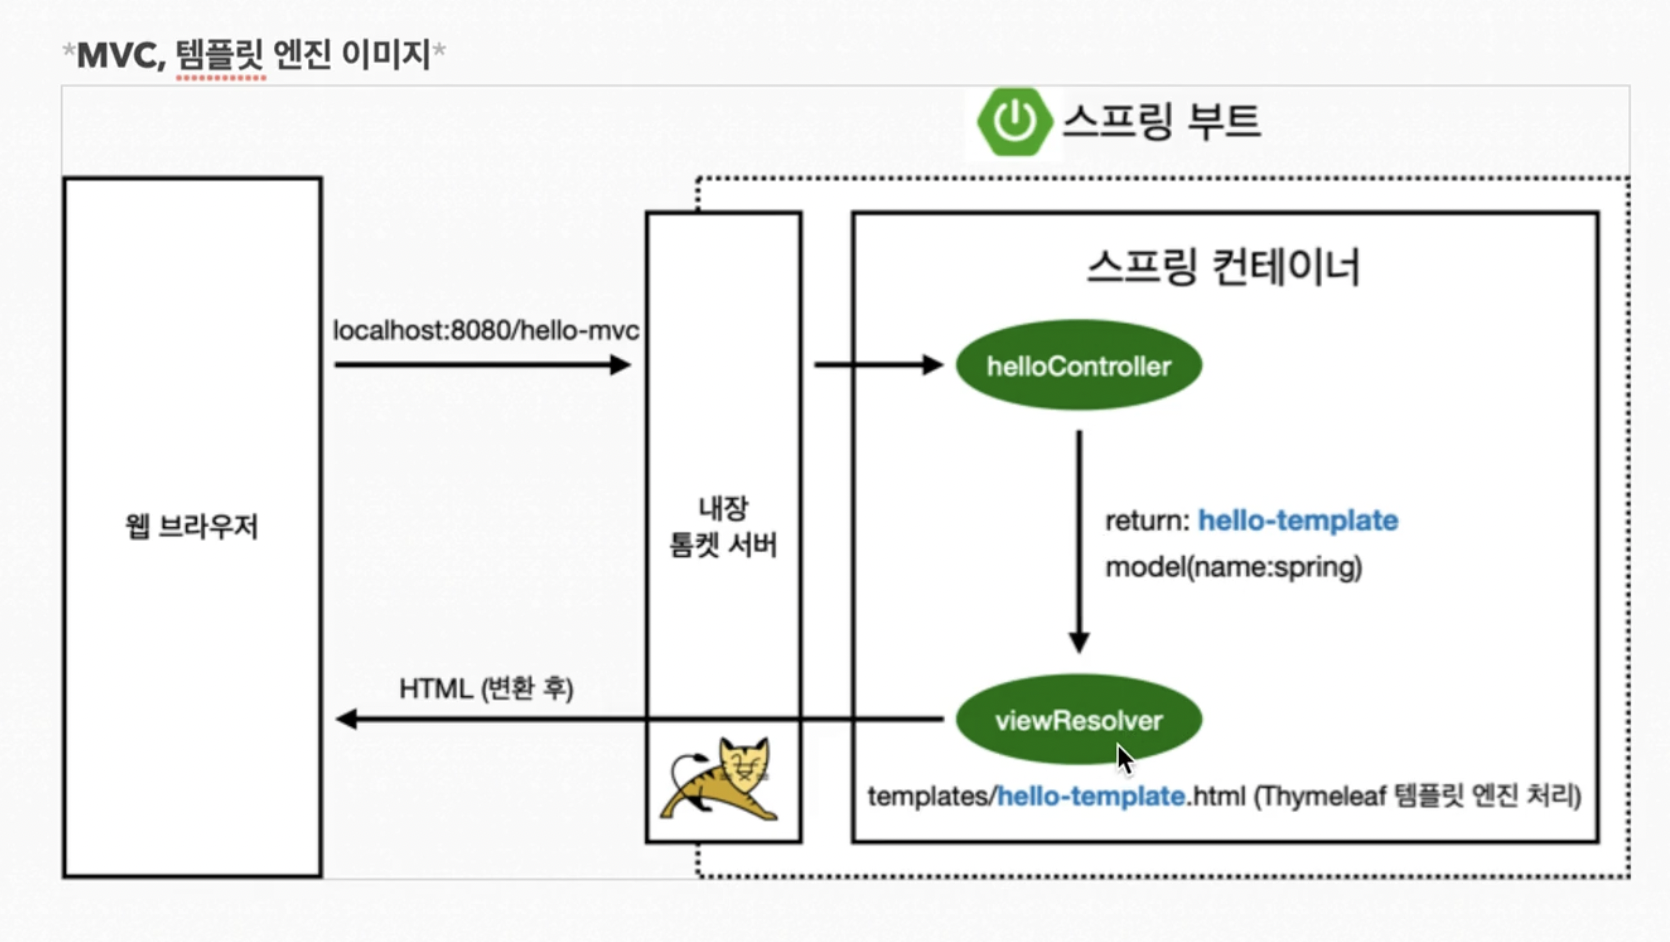
1. 웹 브라우저에서 localhost:8080/hello-mvc 가 내장 톰켓 서버를 거쳐 스프링에 넘어갑니다.
2. 스프링은 helloController의 메소드에 매핑이 되어있는 localhost:8080/hello-mvc를 호출해줍니다.
3. hello-template 를 리턴해줍니다.
4. viewResolve가 key는 name이고 값은 spring인 model을 받아 스프링 내에서 찾아줍니다.
5. viewResolver가 templates/hello-template.html 를 찾아서 Thymeleaf템플릿 엔진한테 처리해달라고 넘겨줍니다.
6. Thymeleaf템플릿 엔진이 렌더링 후 html로 변환하여 웹 브라우저에 넘겨줍니다.
'Spring' 카테고리의 다른 글
| Intelli J 단축키 (0) | 2023.04.03 |
|---|---|
| 6. API (Spring 6) (0) | 2023.04.01 |
| 4. 스프링 웹 개발 기초 (Spring 4) (0) | 2023.03.31 |
| 3. 빌드하고 실행하기 (Spring 3) (0) | 2023.03.30 |
| 2. View 환경설정(Spring 2) (0) | 2023.03.30 |